Annotation
To annotate a file you must access a campaign and then click on a file access link.
The annotator page
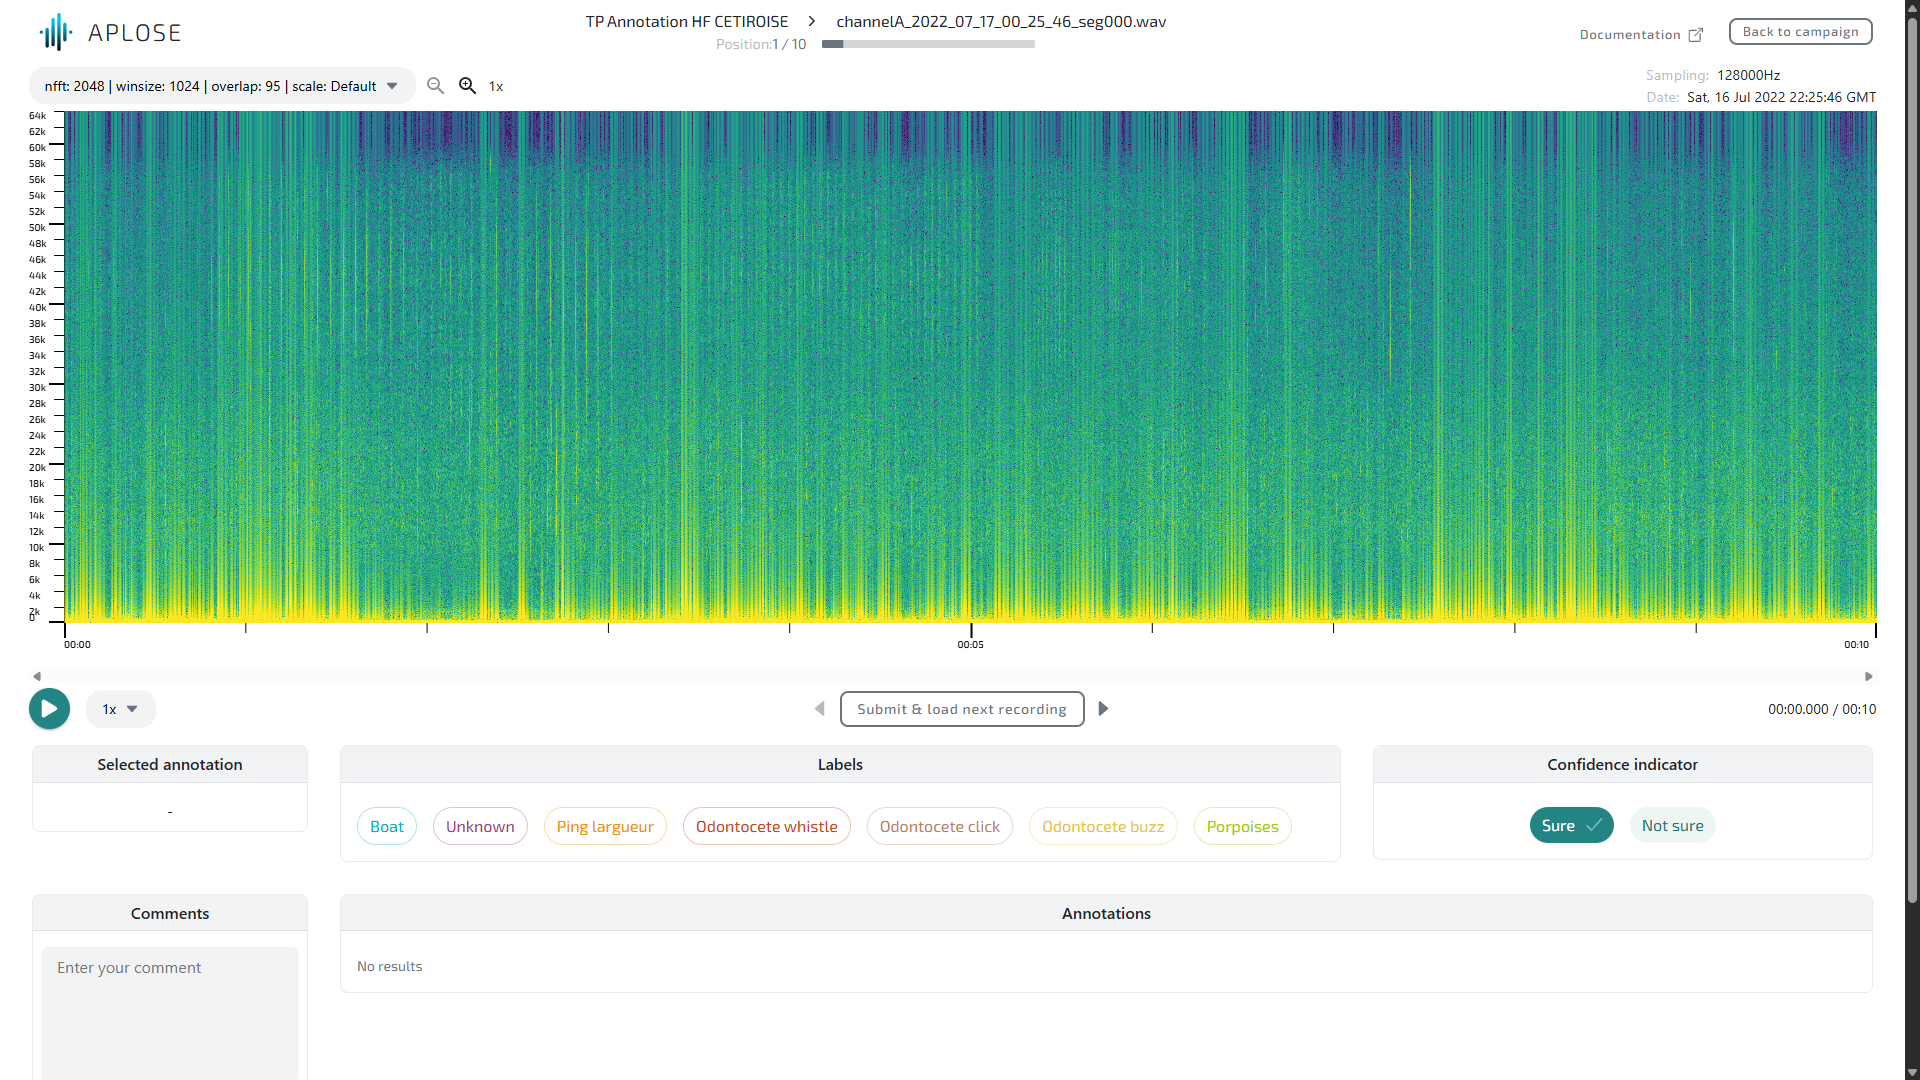
The annotator is the main page of APLOSE. It allows to annotate audio recordings thanks to their spectrogram.
Spectrogram visualisation
The spectrogram is labelled with time and frequency axes. A selector above the spectrogram let you should between available FFT parameters for your spectrogram. You can also have different frequency scales.

Available frequency scales
| Scale | Description |
|---|---|
| linear | Linear scale from 0 to sample rate / 2 |
| audible | Linear scale from 0 to 22kHz |
| porp_delph | Multi-linear scale:
|
| dual_lf_hf | Multi-linear scale:
|
Zoom in spectrogram
A zoom feature is available on time only. You can zoom with the zoom buttons next to the spectrogram configuration selector or with the mouse wheel on the spectrogram.
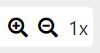
The zoom is discrete: each zoom level offers pre-computed spectrogram, meaning zoom levels are decided by the creator of the dataset.
Listen to the audio file
You can listen to the recording thanks to the play/pause button bellow the spectrogram (on the left). You can set the time position from which you want to start listen by clicking on the spectrogram.

Next to the play/pause button, you can choose the speed of the playback (from 0.25x to 4x). This allows you to hear high frequencies by slowing down the playback, or low frequencies by speeding up the playback.
Shortcut ⌨️
The "space" key on your keyboard is a shortcut for playing and pausing the audio file.
WARNING
Files with a really high sampling rate may not be compatible with your browser. The compatibility limit depends on the browser. Firefox tends to have the wider compatibility.
Tips 💡
Use a headset for a better listening experience!
Annotate
We differentiate several types of annotations:
- weak annotation: a label is present on the file
- strong annotation: a label is present at this exact position (point) or area (box)
For each strong annotation, there is a weak annotation associated to the same label.
In the cas you loaded an already submitted file, your previous submission should appear and can be modified.
Add a weak annotation
You can add a weak annotation my checking the desired labels in the "Labels" bloc.

Shortcut ⌨️
The keys 1 to 9 on your keyboard are shortcuts to the corresponding labels in the list.
You can see all your annotations on the "Annotations" bloc. In this example we have the two selected labels.

Note
If you uncheck a weak annotation, it will remove all annotations, weak or strong, made using this label.
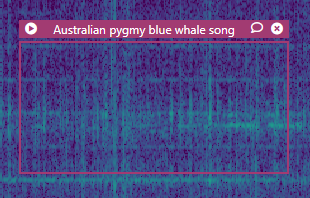
Add a box annotation
In the "Labels" bloc, you can select the label you want to use to create your annotation.
To create a box annotation, click on the spectrogram and drag over the area containing the sound of interest. On click release, the annotation is created and selected.
 This is an example
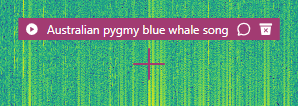
On the header of the annotation, you can see:
- A play button to listen to your annotation
- The associated label
- A comment indicator (see the comment section bellow)
- A button to remove your annotation
The strong annotations are listed in the "Annotations" bloc. Each strong annotation is bellow the corresponding weak annotation.

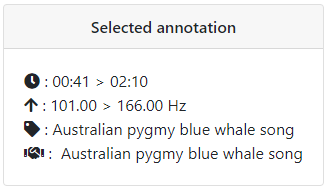
In the list, you can see the time and frequency coordinates of your annotation. The information can also be found in the "Selected annotation" bloc right bellow the spectrogram:
To change the label of your annotation, you must select the annotation and then click on the right label in the "Labels list" bloc.
INFO
Please note the boxes cannot be moved or resized for now.
Add a point annotation
To add a point, select the desired label and then click on the spectrogram at the point of interest.
 This is an example
You'll then have the same information as for a box annotation.
Check an annotation
In "verification" phase mode, the "Annotations" bloc contains all the detector or annotator output you need to confirm or infirm.

Here is an example with a weak label.
The buttons on the right let you choose either you find the annotation correct or not. You can change the annotation label and move or resize the incorrect annotation.
Add comments
You can add comments on each annotation or on the task.
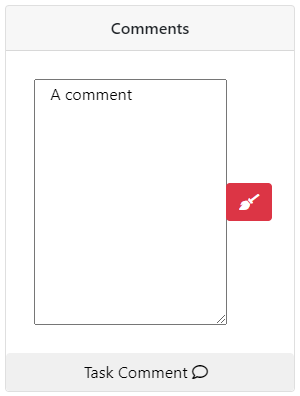
To add a comment to an annotation, first select it (in the "Annotations" bloc or on the spectrogram). To add a comment to the task clik on the "Task Comment" button at the bottom of the "Comments" bloc.

The comment icon changed based one the existence of a comment: the buble is filled if a comment exists for the annotation or task. This information is displayed for each annotation in the "Annotations" bloc or in its header on the spectrogram, and for the task on the "Task Comment" button at the bottom of the "Comments" bloc.
Specify confidence
If your campaign allows you to, you can specify the confidence level you have on your annotation by selecting the appropriate one in the "Confidence indicator" bloc.

Acoustic features
When you create a box with a label allowing acoustic features, a bloc appear next to your box. If you set the quality as "good" you will be able to specify the signal acoustic features.
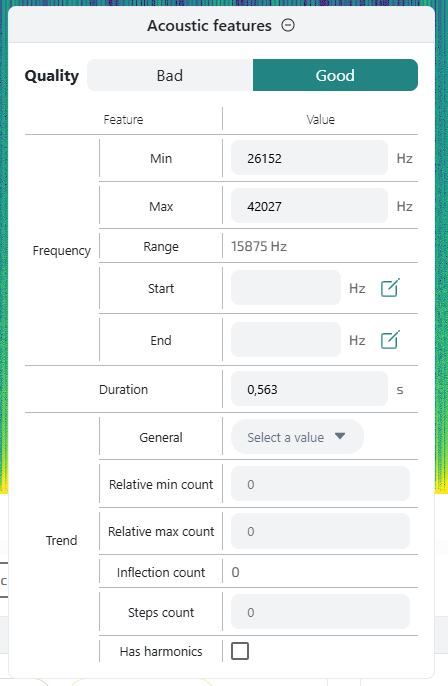
| Field | Unit | Description |
|---|---|---|
| Frequency min/max | Hz | Directly linked to the box frequency bounds |
| Frequency range | Hz | [Auto] Difference between the max and min frequencies |
| Frequency start/end | Hz | Frequency of the start/end of the signal. Can be picked directly on the spectrogram thanks to the pencil button |
| Duration | s | Duration of the box, directly linked to the box time bounds |
| Trend | General trend of the signal (Flat, Ascending, Descending or Modulated) | |
| Relative min/max count | Number of relative min/max frequency | |
| Inflection count | [Auto] Number of inflection points: sum of relative min and max frequency | |
| Steps count | Flat frequency part counts | |
| Has harmonics | Does the signal has harmonics |
All the features are optional.
Submit and navigate
The navigation buttons are located below the spectrogram. 
Shortcut ⌨️
The "enter" key on your keyboard is a shortcut for submitting your task and moving on to the next task. Use the left and right arrows on your keyboard to navigate between tasks.
To save your changes, you must click on the "Submit & load next recording" button once you're done. This will automatically load the next file.
The arrow buttons allows you to navigate between the files
Be careful
The navigation does not save the changes you've made.