Skip to content

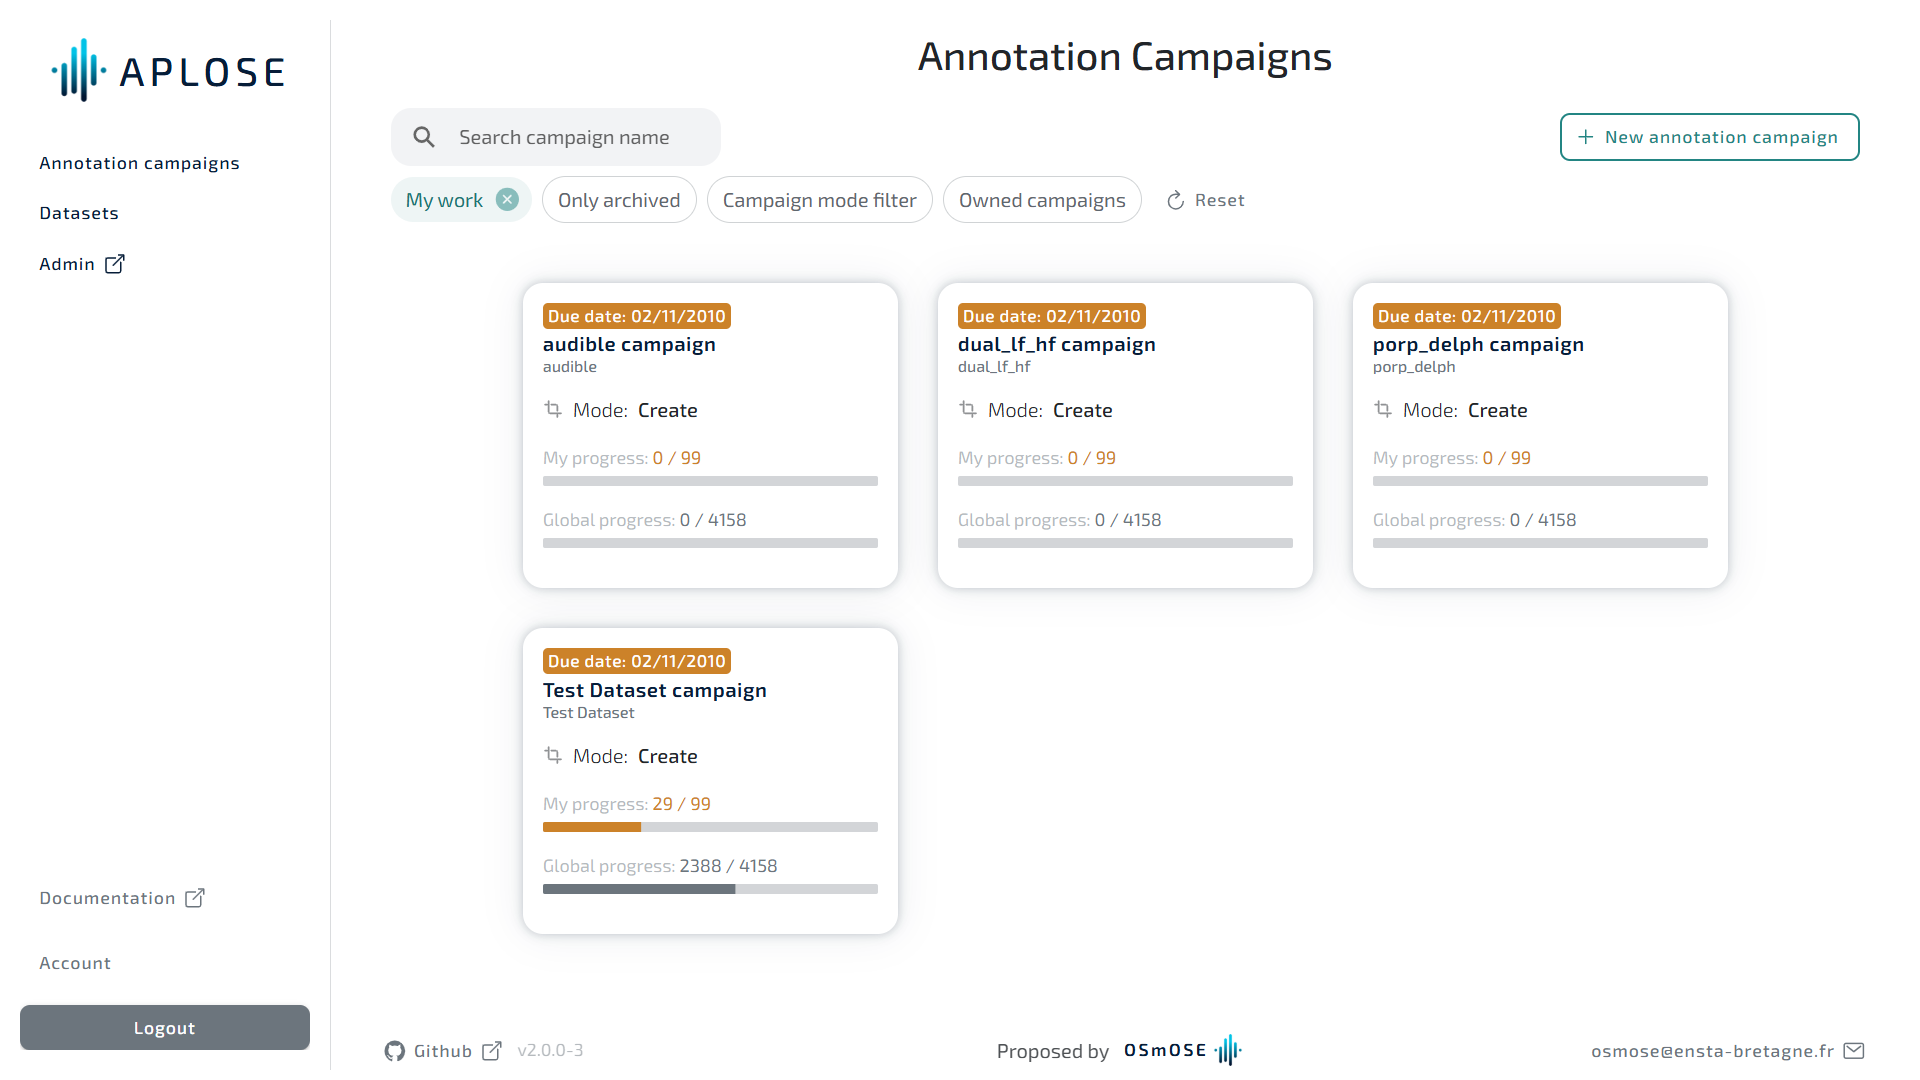
Create an annotation campaign

To create a campaign click on the "New annotation campaign" button.

Global information

You can fill in the global information.

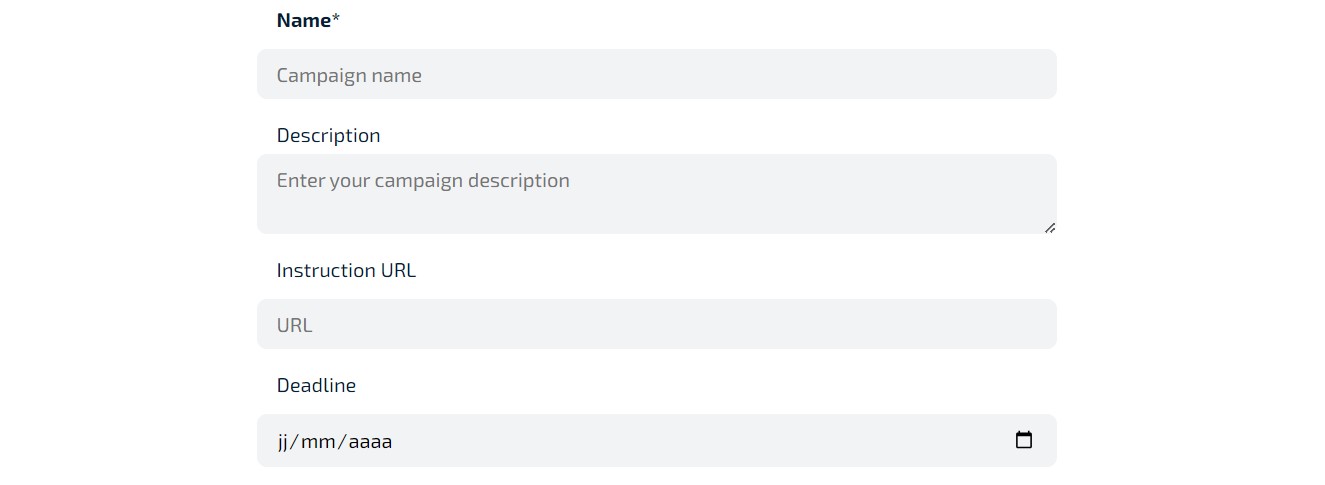
  • Only the name is required.
  • The description can help your annotator to understand the purpose of this campaign for example.
  • If you have web page or a PDF stored online you can give its URL on the "Instruction URL" field. It will be accessible to the campaign annotators
  • The deadline will also be available to the annotators.

Data

You can then select the dataset to annotate.

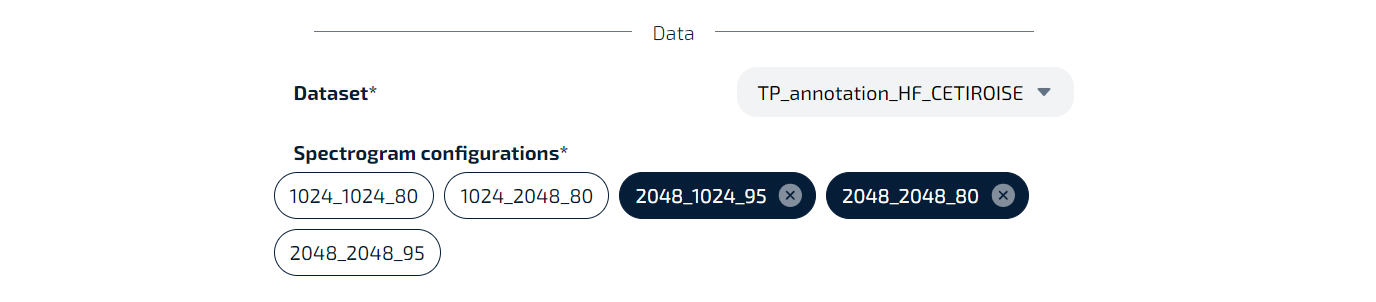
You will be able to choose one or more spectrogram configuration among the available ones for the selected dataset.

Annotation

You can select the mode of annotation you need:

  • Create annotation: create new annotations on an empty campaign
  • Check annotations: validate and invalidate annotations, from a detector output for example

Create annotation mode

If you choose the "Create mode" you will need to select a set of labels (read the detailed section below to create a new label set). You can also select a confidence indicator set (read the detailed section below to create a new confidence indicator set).

Once selected, the information about the set are displayed. You can choose to enable "Acoustic features" for some labels (see Annotator/Acoustic features)

You can also choose to allow "Point" annotations. (see Annotation/Add a point annotation)

Create a label set

Access APLOSEs administration part with the "Admin" link

Look for “Label sets” in the “API” block and click on “Add”

You can fill in the form with the name of your set, the owner (you), and select the labels you need for your annotation campaigns. If you do not find the desired labels, you can click on the “+” button close to the labels list to create a new label.

When your form is filled you can save it.

Create a confidence set

Access APLOSEs administration part with the "Admin" link

Look for “Confidence indicator sets” in the “API” block and click on “Add”

You can fill in the form with the name of your set and save it.

You can then look for the “Confidence indicators” in the “API” block and “Add” as many indicators as you need.

For each indicator you must fill the label, the level and the associated set that you have just created. You can define an indicator as the default one for your set by checking the “is default” checkbox.

Check annotation mode

With the "Check annotation" mode, you will be asked to import annotations.

It will open a modal to really import you annotations

You can either click on the "Import annotation" zone or drag a file in it. The file should be a csv with the following columns:

ColumnTypeDescription
datasetstringName of the dataset. If it doesn't correspond to the campaign dataset, you will have the choice to keep it or not
start_datetimetimestampStart of the annotation
end_datetimetimestampEnd of the annotation
start_frequencyintLower frequency of the annotation
end_frequencyintHigher frequency of the annotation
annotationstringLabel of the annotation
annotatorstringDetector or annotator that created the annotation
is_boxbooleanEither the annotation is a box or a weak annotation
confidence_indicator_labelstringThe name of the level of confidence (if exists)
confidence_indicator_levelstring
[int]/[int]
The level of confidence on the maximum level available (if exists)

In the case of weak annotations, start/end datetime and start/end frequency should be the ones of the file.

After submitting your file, you will need to configure the detectors as they will be saved in the database.

You will be asked to assign the CSV detectors to an existing one or to create a new one. Here you can also select only the detectors you want to check, in case the file contains multiple ones.

You can then specify each detector configuration (existing or new one).

When you're done you can click on "Import". The selected detectors will be shown on the page. You can review the selection at anytime here. If you want to fully change it, you can hit the trash button and import a new file.

Annotators

In the last part of the form, you will be able to add annotators on your campaign. For each annotator you can specify the range of file he/she can annotate. You can set two different ranges for the same annotator. You can add new annotator with the search input.

You can also add annotators by group.

Create an annotator group

Access APLOSEs administration part with the "Admin" link

Look for “Annotator group” in the “APLOSE” block and click on “Add”

You can fill in the form with the name of your group, and add the users you want in.

When your form is filled you can save it.

INFO

You will be able to add annotators or files to an annotator at any time.

Submit

You're all set and can submit your new campaign by clicking on the "Create campaign" button. After submitting your new campaign, it should appear in the “Annotation campaigns” list.